Pages

Tuesday, August 5, 2014

Bigger Bedrooms

One of my requirements for buying a house was that it had to have decent sized kids' bedrooms.  Don't get me wrong, I don't think kids need huge spaces to themselves.  I just prefer that there is room for more than just a bed and nightstand.  My kids like to play, read, draw, and do all sorts of things in their rooms, and when the bed takes up more than half of the space it just feels cramped and unwelcoming.

When Cory and I looked at this house I immediately knew the bedrooms would be a problem.  Two of them were SUPER tiny and a third was a decent size but had two dormers and was narrow.  It made for an awkward space that would be tricky to fit furniture in comfortably.

Two tiny rooms (each had a full-sized bed that ate up most of the floor space):


Awkward dormer room:

There was a dormer on each side of the narrow closet.  I don't believe there was even a hanging rod in the closet; there were simply a few shelves.


I believe the previous owner used the counter for scrapbooking.

Awkward, right?  I mean, where do you even put a bed?

So when we created the open upstairs study area for the kids we did it so that we could expand the two really tiny bedrooms and still have a "hallway" to get to each room.  The rooms as they were just didn't make sense for us.

THIS makes sense for us.


By taking the few feet from what was the hallway and adding it to the two tiny back bedrooms we ended up with two really nice sized rooms for Tessa and Clara.


Months and months of demo, wiring, plumbing, plaster repair and drywall installation transformed these spaces dramatically.

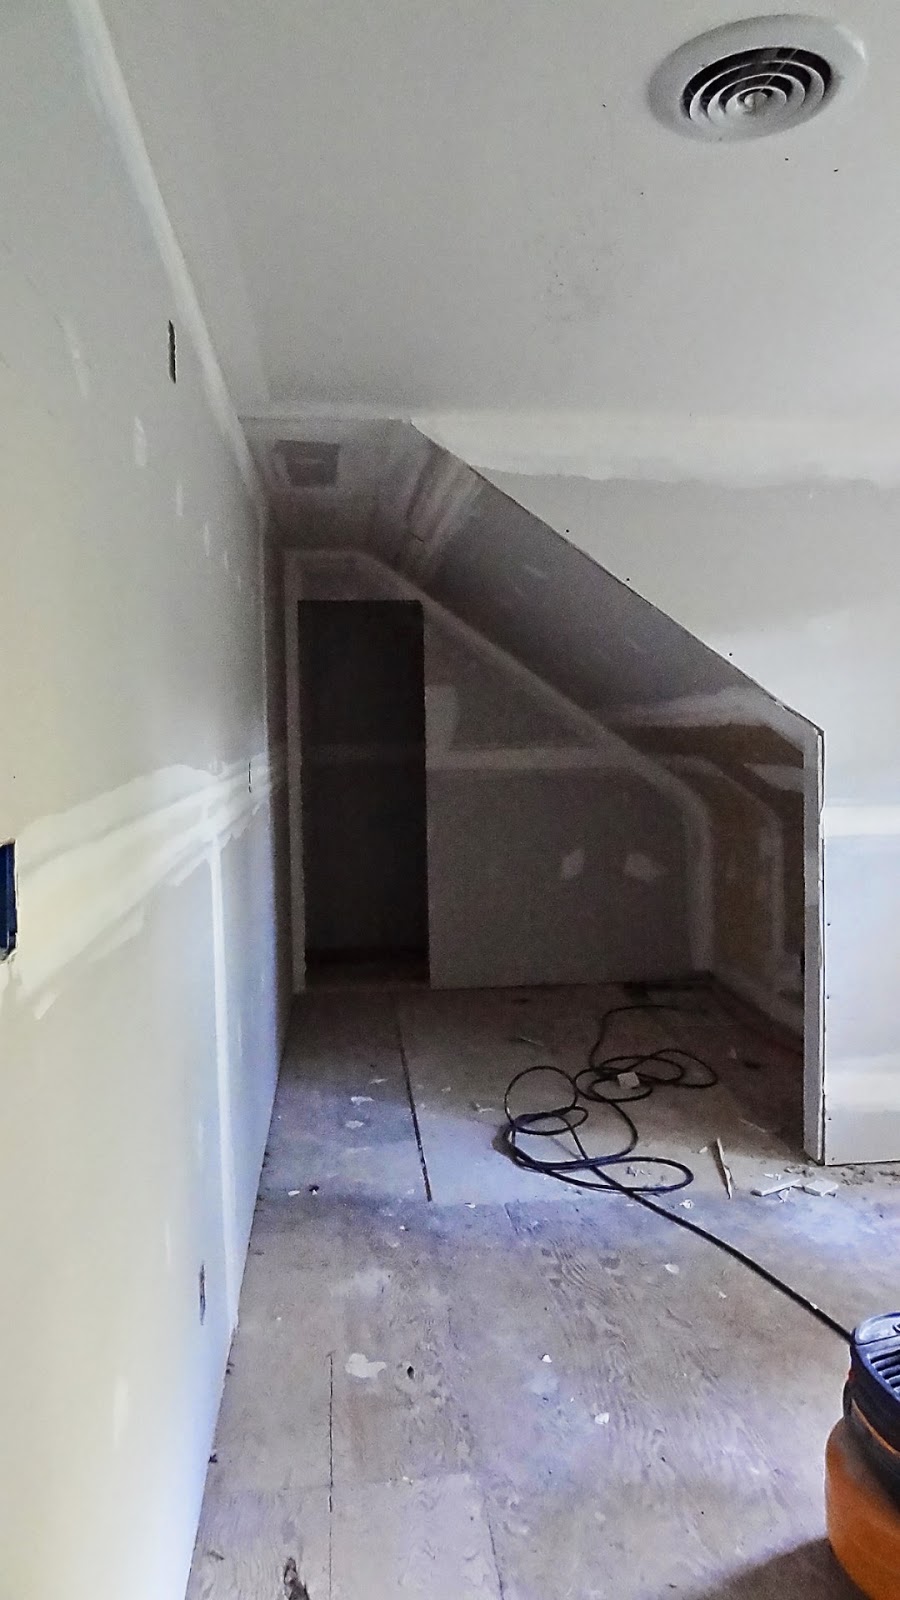
This is now Tessa's room!  She has some neat angles in this corner because the other side of the wall is the top of the main stairs.  I saw the angles as an opportunity to do a fun paint accent.


Professional painters did all the priming, ceilings, and main walls.  I decided to paint the accent colors myself after learning that the painters charge $100 for every color they use.  I had eleven colors in the upstairs alone.  WHAT???   No way was I paying an extra grand for paint.  So I nixed several colors entirely and got to work painting.


Gray, yellow, and white has always been one of my favorite color combos.  I knew that I wanted to do Tessa's room in those colors.  It was a no-brainer.  All the walls in her bedroom are a pretty, soft gray except for the corner wall which is a cheery yellow.  I'm going to do a stencil treatment in white on the opposing wall.


This room is SO MUCH roomier, brighter, and happier than it was before.  Can you believe the difference?  And it's not even done!

Clara gets the room beside Tessa's.  Her's started as a tiny, dirty, red room:


Underneath that threadbare carpet was this:


Lovely, right?  This was actually what we found under all the bedroom carpets.  There was hardwood around the perimeter and carpet in the center.  The carpet was so saturated in dog pee and who knows what else that the padding just crumbled apart.  I can tell you that that was fun to clean up.  Heh.

Anyway, her room picked up the same amount of space from the hallway that Tessa's gained.


One difference between the two rooms is that while Tessa has a relatively small closet due to it being on an angled corner, Clara's closet ended up being quite spacious.  Before it was a small closet with a set of built-in shelves to the left.  The extra square feet from the hallway ended up doubling the size of the closet.  However, you can see that it has a window in it.  That window was in the last bedroom at the end of the hall that had the Williamsburg-esque built-in bed.


Not to worry though.  The roof line outside that window was raised for the addition so the other side is now a back stair case.  The crew just removed the window and drywalled the space to make it complete.


Her walls were painted a soft white, and I painted the window wall a pretty teal color that is in her bedding.  The opposite wall will have a geometric stencil treatment in chocolate brown.  I'm SUPER excited about these stencil walls!


I'd say it's a big improvement already!  

It's truly amazing how much a few feet of space can do for bedrooms.  These girls will be quite happy here for a long time.

Friday, July 25, 2014

A Hallway No More

Perhaps one of the most dramatic changes we are making to our new house involves the upstairs floor plan.  The house had five bedrooms upstairs but most of them were super tiny.  Four bedrooms were separated by a long hallway and everything felt cramped and dark.


We decided to create a totally new floor plan with just four bedrooms upstairs, and each of them would be a decent size.

This involved a LOT of demolition.  If fact, almost every wall in the above photo had to come down.  All the flooring had to be removed.  The big house fan in the hallway ceiling had to go, as did tons of other things like closets, lighting, a built-in bed, and baseboard heaters.  This stage of demo took us many, many weeks and we had to enlist the help of some friends from church to get it done by our contractor's deadline.  And every time we thought we were done ripping and tearing, there was more to do.


Let me just say that construction crews, especially demolition crews, are worth every single penny they charge for their labor.  This is hard work.  It's dirty work.  It's exhausting work.  If you've ever watched an HGTV reno show and thought, "I'd LOVE to do that!  I want to buy an old house and fix it up!  How FUN that looks!", you would be dead wrong.  Everything looks simple and easy on tv.  The reality is much, much different.

Anyway, we spent evenings and weekends as a family at the house doing this work.  The kids sometimes picked up a hammer - or even a sledgehammer - and pounded away.  We filled countless buckets full of plaster, nails, wood, and general debris to throw into the dumpster.  And the hallway and upstairs started to look different.


Eventually we got to the point where all the necessary walls were gone and the floors were cleaned up down to the subfloor.  At this point, the plumbers had to remove the heaters and copper pipes and the electricians had lots of wiring to do.  And those clean-swept floors?  They stayed that way for approximately 14 minutes before they became covered with more debris.  That was a vicious cycle that went on and on and on.


But then look what happened!  New walls appeared!  This is the same view as the first photo taken from the entrance to Dixon's room.  Here's a side-by-side for better comparison:


It's a bit hard to tell, but the hallway is officially gone.  The space that was hallway is now a part of two bedrooms at the back of the house (on the left side of the photo).  At the top of the main stairs is now a spacious landing area that angles around to provide access to the new front part of the upstairs.


You can see how much space the bedrooms picked up by taking over that hallway.  The "wound" in the ceiling is where the bedrooms previously ended.

And a view from the now open area at the front of the house looking towards the main stairs.


Oh - see the open floor joists?  All of the floors joists were filled with blown-in insulation.  If the kids are loud, stomping their feet, jumping around in their rooms, etc., we won't hear it downstairs.  *huge smile*


I'm so happy with how much more spacious these two back bedrooms now are.  Where there were once four bedrooms and a hallway we now have two bedrooms and an open study area for the kids to share.  The amount of time and work it took to get to this point was incredible, but it will be so very worth it.

And after months and months of demo, construction, rewiring, plumbing, more demo, etc., I finally walked upstairs last week to see THIS:


Yes folks, that is the same space!  This is the current view from the end of the open study area near the main stairs.  The two bedrooms are on the left, Dixon's room is behind me, and Sasha's room is through the doorway at the back of the photo.  This space will become home to two long desks for the kids and all their schoolwork and art supplies.

When I took this photo the paint crew was in the process of priming the upstairs, hence all the paint supplies on the floor.  As soon as I pulled out my camera and said I was going to take a picture they scattered like ants into the bedrooms.  Silly boys.

It's starting to look like a home!

Sunday, June 29, 2014

Adding On

I apologize in advance . . . this is going to be a long post with lots of photos.  I take photos of the progress almost every time I visit our house, but clearly I don't get around to blogging them often enough.  So today I'm going to pile it on here.  Ready?

Our house had five bedrooms when we purchased it in November.  But like you've seen in past blog posts, those bedrooms were teeny tiny, oddly shaped, and most importantly, they were all upstairs.  The last of those qualities was almost a deal-breaker for me.  My kids can surely deal with small bedrooms.  At this point they would be thrilled with just about any room as long as it was their own since the big girls have shared a room since they were 2 and 4 and Tessa has been in our room her entire life.  Dixon is the only one who has always enjoyed a space to himself.  The perks of being the only boy I suppose.

The problem with the bedrooms being upstairs is really MY issue.  I have developed terribly swollen and arthritic knees since Tessa was born.  Before I found out what was wrong (bipolar patella femeral syndrome with arthritis, if you're interested), my knees were swollen to the size of cantaloupes and the simple act of swinging my legs up onto our bed at night was painful.  Going up and down stairs and sitting  / standing up were agonizing movements.  And forget getting on the floor to play with the kids.  I felt like a 90 year-old woman.  Thankfully, I've figured out how to manage the swelling and pain a bit.  I still don't have normal knee function and sometimes I find myself in horrific pain when I do something I shouldn't (like drop to the ground playing Duck, Duck, Goose with the kids).  But because of my knee problems I knew one thing for certain.  I needed my master bedroom to be on the ground floor of our new home.

This is our forever home.  If my knees are this bad now, I imagine they aren't going to improve with time.

It was actually quite fun designing our master addition.  In some ways we felt like we could do whatever we wanted since we were starting from scratch.  At the same time, we were limited to the confines of the property.  There was only one direction we could go because of the stream and the laws defining how close you can build to the water.  So we ended up making a really, really long house.   My only concern is how far away from the kids we will be at night, but we found a solution that makes me feel a bit better about that.

To begin, the excavators had to bring in the heavy equipment and, well, dig.


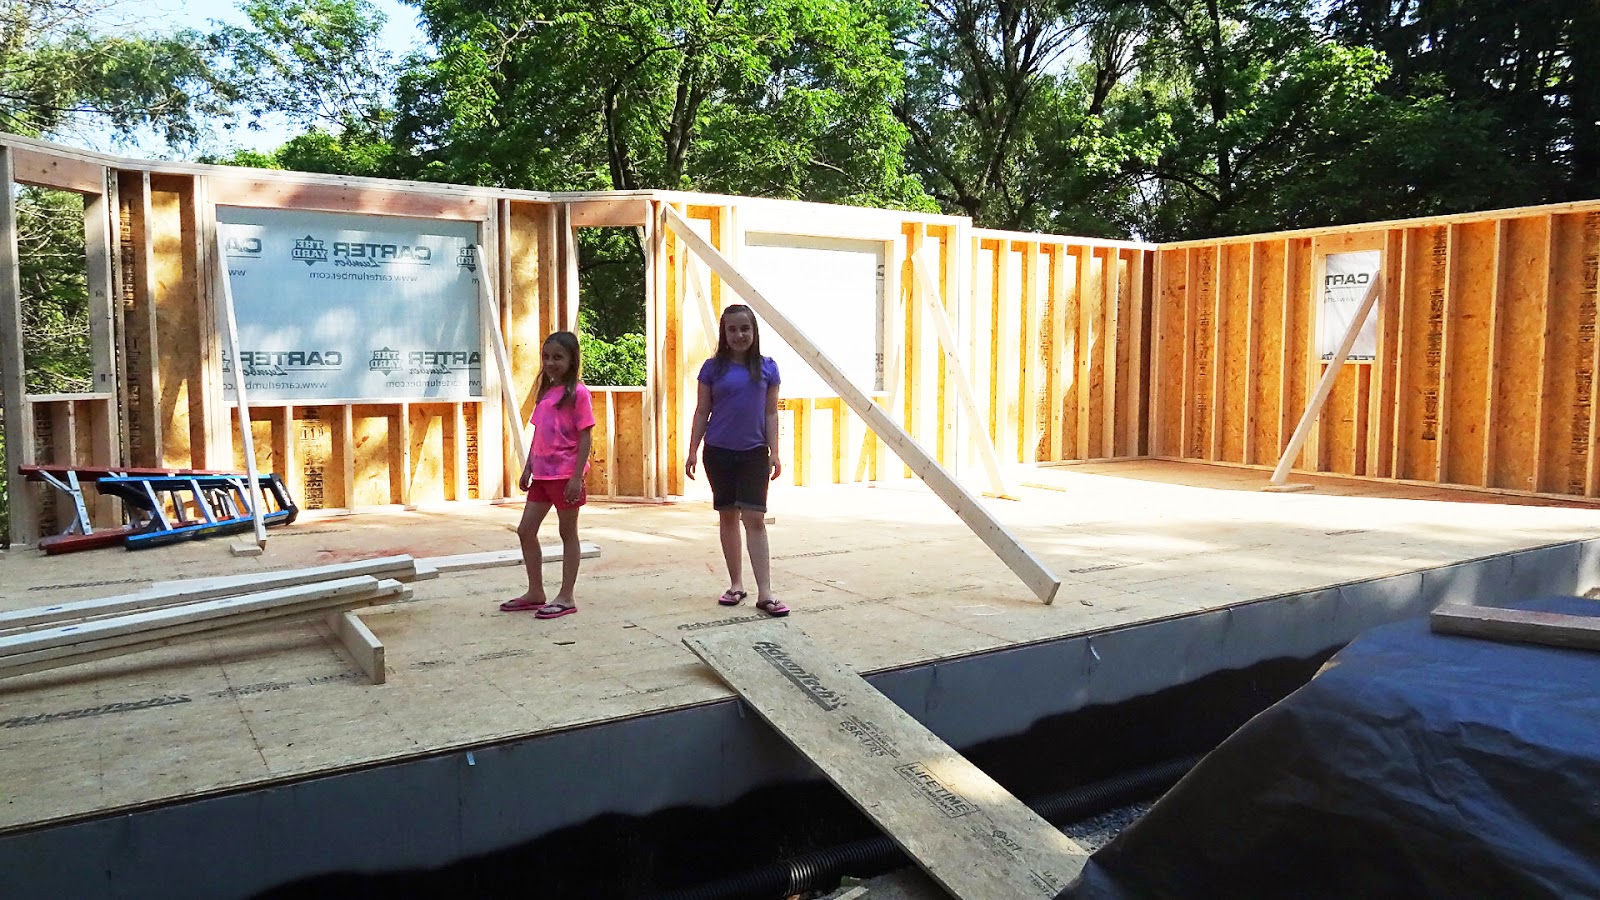
The original plan was to have a full basement under the addition.  We even considered insulating it and possibly connecting it to the current basement, but that expense wasn't in the budget.  Plus, the excavators ran into so much rock that it would have been difficult to get the height necessary.  So they stopped digging and we ended up with a great space that just doesn't have much head room.  Cory can just barely walk in the space without hitting his head on the ceiling.


It's totally okay with us that this won't be living space.  We really only plan to use it to store the lawn mowers and possibly seasonal kids' toys.

The footers were poured and we could almost / sort of see how the addition was going to take shape.


Once the concrete had set the framers arrived and went. to. town. Seriously, the walls seemed to FLY up on the addition!  You can see a bit of the basement space under the sub floor and you can also see how parts of our master suite cantilever out towards the stream.


Remember that old sun porch?  This is where it once stood.  The door on the left goes to the garage.  It will be moved to the left to allow for something new (that "something" will be seen soon).  The door to the right will no longer exist as it will be the entryway into the family room.

Oh, and that roof?  It's about to disappear as well.


Our bedroom walls soon appeared.  I have to say that the views we have of the stream are breathtaking. I may never want to leave this space!


The interior walls were next.  At the far end is our closet.  The linen closet, toilet closet, and shower are in the middle.  The soaker tub will sit in front of the big picture window on the left.  And the wall separating the bathroom from the bedroom goes on the near side of that window.


Finally, the day Cory and I were waiting for finally came.  The trusses arrived!  We chose to have a cathedral ceiling in our bedroom to really give it a spacious feel.  We are SO happy with that decision!  The rest of the house has average ceiling heights, so this is the one room that will have a more grand feel.


At the other end of the addition, the space for the laundry and mud room was coming along as well.  There is another big picture window opposite the laundry room doors and a set of french doors will lead to a big deck.


And the roof is GONE!  That space above the garage that was once zoned only for light storage has been beefed up and expanded.  It is now Sasha's bedroom.  We raised the back roof line so she gains space and has enough room for a closet.  Plus, raising the roof line allowed us to include that "something" I mentioned earlier to help me get over being so far away from the kids at night.


That "something" is a set of back stairs!  Instead of having to walk all the way through the house to get to the front foyer and stairs to get to my kids at night, I will now only have to walk through the mud room area and go up the back stairs.  It gives me tremendous peace of mind knowing that I have quicker access to my babies.

So in this photo you can see the stairs are where the door to the garage used to be.  The new entrance is by the green ladder.  We will have six cubbies, three on each side of the door, in our mud room area so we can drop our shoes and coats there instead of dragging them into the house.  The entrance into the family room is also now visible.


Here is a view of the back stairs looking up towards Sasha's room.  At the top of the stairs is a landing, then straight ahead is a storage room.  Sasha's bedroom and closet are to the left.  To the right is an entrance into the kids' study area that leads to the other bedrooms.


And a view looking down the stairs.  I love the window at the top and the light it brings into the space.


Can you tell I'm excited about those stairs?

So standing at the entrance to the family room, this is the view.  Back stairs are to the right, mud room area is next, and then the framed-in space is the downstairs laundry room.  Our master bedroom follows.


The outside of the addition is now covered and the roof has been added.  It's a good thing too, since we had a couple weeks of heavy rain.


One of the more difficult decisions we had to make was regarding the siding and trim colors.  All of the current siding and trim is being replaced to match the addition so we had to choose colors that would work with the existing stone and brick.  I REALLY wanted a bold, dark color, but we couldn't find it in the vertical board and batton style of siding we like.  So eventually we settled on a light gray siding with white trim.


Progress!  Our deadline for moving is very quickly approaching, so hopefully the work inside will go super fast from now on.  Now that all the rooms have defined shapes we are itching to get in there and start our lives in our new home.

Tuesday, June 10, 2014

Progress!

I'm dreadfully behind on my blog posts.  So much has been happening at the house over the past few months and it's taken me longer than I anticipated to document each stage of destruction.  But there has been LOTS of progress "reconstructing" the house so I thought I'd start to share the really good stuff!

Let's start with Dixon's bedroom.

Originally this was the master bedroom and bathroom.


The doorway on the right led out to the hallway.  The door by the windows had that strange toilet.  Off to the left was the bizarre bathroom / closet area.


After we gutted the bathroom area including the infamous Green Monster, we tore out the flooring.  There was hardwood around the perimeter of the room under the carpet, so that was fun to tear out.  Heh.

Then we started to sling our sledgehammers into the plaster wall that separated the right side of the bathroom from the bedroom.  We followed the angle of the shed roof carefully while opening the space as much as we could.


As it turned out, our contrator had us remove the plaster on the entire wall since they needed to blow in new insulation and fiddle with the electric a bit.  Plus it's easier to just hang new drywall than try to work around old plaster.


The framers studded the new bedroom walls and things started to feel real in there quickly.  The wall above splits the former master in two.  On the right of the photo above is the new doorway into Dixon's room.  The rest of what was the master is now a hallway to the bathroom and an upstairs laundry area for the kids.


The area above used to be bathroom.  The shower, a.k.a. the Green Monster, was at the left of the photo.  There was a vanity and mirror at the back wall and closet space along the right wall.  Now this area is going to be a play area for Dixon.  I plan to put his train table against the wall and other toys and books he loves will go there as well.  At the very back of the space is his new closet.  I think this space is going to work quite well for him!


Ta-da!  We have drywall!  Now the shape of the room is REALLY clear.  Sleeping space up front, play area in the middle, closet at the back.


A different angle of his room: you can see he still has the windows for light and a view of the stream.  But the toilet closet is gone, thank goodness.

Progress is definitely being made!

Wednesday, June 4, 2014

RIP, Sun Porch

I think it's safe to say that most people would love to have a sun porch, especially one that faces large evergreens and a gorgeous stream.  On warm, sunny mornings you could sip your coffee while reading the paper on the porch with the sounds of the water and birds in the background.  Sounds peaceful and lovely, no?

Our new house had such a sun porch.  Had being the operative word.


The porch can be seen in the photo above, behind the horrible snow mound.

And here is a better look at it.  (Overlook the ladder.)  It had floor to ceiling screens all the way around and could be accessed from the garage, the family room, and the outside.  Under the porch was an air conditioning unit and a place to tuck away a lawn mower or whatever else you would want to store there. 

 There was also a metal railing along the top of the porch on the roof.  When we first looked at the house we though the railing meant we could use the rooftop as outdoor living space as well, but it turned out that the railing was purely decorative.


Anyway, while the idea of a nice, big sun porch was indeed lovely, Cory and I knew this one had to go.  It was quite old and when standing inside you could feel the floor sloping towards the stream.  It just didn't feel sturdy and safe.

I never got a photo of the inside as it was before, but here is what it looked like full of wood flooring that we tore out of the house.


And this is the view of the stream.  This view almost makes me sad the porch is gone. Then I remember that we'll still have that view but in a much more useful space.


But the biggest reason we had to say goodbye to the porch is because our master suite addition needed to be accessed via that space.

Try to follow me for a moment.  The area that WAS the sun porch is about to become a mudroom / laundry room and hallway to our master bedroom, which will be added beside that section of the house.  Does that make sense?  We really need to have a downstairs master and this was the only place we could put it because of where the stream runs on the property.

If we had paid professionals to demo this porch we would have forked over about $3,000.  Yep.  Three. Thousand.  Dollars.  Seems pricey, right?  Since we did ALL the demo in the house ourselves, we couldn't bring ourselves to spend that kind of cash on something we knew we could tackle.  The problem was, we needed more manpower.  Cory couldn't do this himself, and my 5'2" self can only handle so much "manly" labor.

Once again, our family was awesome and totally stepped in to get this job done.  I popped into the house one afternoon and saw this:


That's Cory's dad and another guy from the farm on the roof of the porch.  They had already removed the metal railing and layer upon layer of roofing material and tar.

I have to insert a tidbit about Cory's dad here.  He is a dairy farmer and perhaps works more hours than any human I've ever met.  "Free time" is hard to come by for him.  So for him to take the time away from his own work and come to our house and do all of this for us was amazing.  It was totally selfless and I can't tell you how much I appreciate it - how much I appreciate him.

Anyway, it took these two guys three or four trips to the house to get the entire porch down.  They did it step by step, top to bottom.  Cory and I didn't have to do a thing.  And it turned out that the areas where the porch were attached to the house were rotten.  There was a lot of wood damage and even big spaces where mice and squirrels were able to get inside.  I think it was a darn good thing we took the porch down before it fell down.


Before we knew it, the porch was gone.  Well, it was no longer intact.  All the materials were piled on our driveway and grass so we could sort out the metal to take to a scrapyard.


The house has officially undergone a porch amputation!

The doors were boarded so no one would try to walk through them and then we had to work on getting rid of the last bit of "stuff" on the ground.  The kids actually took apart the brick tower that supported the middle of the porch.  Cory showed them how to break apart the bricks, then they put them in their red wagon and took them to the front of the house and built a little "house" of their own.  It was pretty cute.


RIP, sun porch.  I'm sure many celebrations took place within your walls and many peaceful moments were enjoyed there as well.  We're excited to give the space a new purpose, a new life, and a totally new style.  It's going to be pretty awesome.